Dryer Belt Replacement
You are tardily for operate; yous ask those freshly washed pants, and so you quickly throw inward the last charge of clean washing into your trusty dryer. But all y'all hear is chaotic banging together with jolting coming from within your dryer.
The probable effort of these noises is a broken dryer belt. But don’t permit your listen spin out of command on what to do adjacent, nosotros take set together a unproblematic lead on DIY belt repair, and yous can be upwards in addition to drying once more in no time.


On average, DIY dryer belt replacement costs $eight-$x (average toll of a belt). The replacement procedure is relatively elementary, in addition to at that place are many videos available online. The basic steps are: disconnect the dryer, take the front panel too the drum, loop the novel belt on, reassemble too reconnect the dryer.
How Much Does a Dryer Belt Cost?
Luckily, dryer belts are pretty much the least of your worries when it comes to dryer repair as well as maintenance, equally they are the least expensive office to replace. They don’t involve to live replaced really oftentimes; notwithstanding, it does depend on how ofttimes y'all function your dryer and how heavy the loads are.

Dryer belts can toll from $three to $25, averaging betwixt $viii together with $10. This is without having a professional person repair it for y'all. However, it likewise depends on the make too model of the dryer. Some brands are more expensive than others.
Brands such every bit Whirlpool in addition to Hotpoint can thin on the more expensive side, alongside prices reaching $xv in addition to $25, respectively. Brands like Maytag together with Roper lean towards the cheaper side, alongside prices reaching $ix in addition to $8, respectively.
Cost of Professional Instalment of Dryer Belt
If yous are going to hire a professional person, it is advised to become a few quotes from different companies or individuals and compare them because professional dryer belt replacement can live quite pricey. You may even country upwardly paying about what you lot paid for the dryer initially.

Professionals tin accuse a service fee of near $50 to $99. And that is simply the service fee. They may charge double or triple the retail toll for a novel belt too. You tin terminate with a concluding neb of up to $295.
You tin can besides contact your manufacturer nearly your warranty too if your dryer is nevertheless nether warranty y'all may not involve to pay for the repair or replacement parts. If this is non the example, and then the next best option would live to replace the belt yourself.
A lilliputian DIY never hurts anyone and luckily replacing the belt is simple.
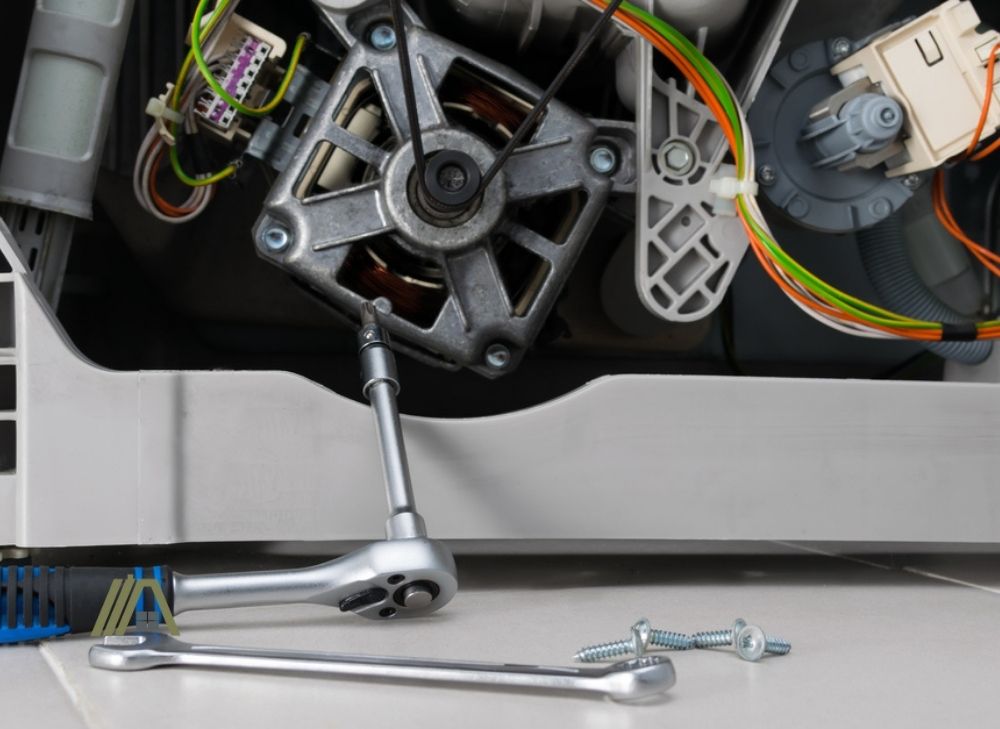
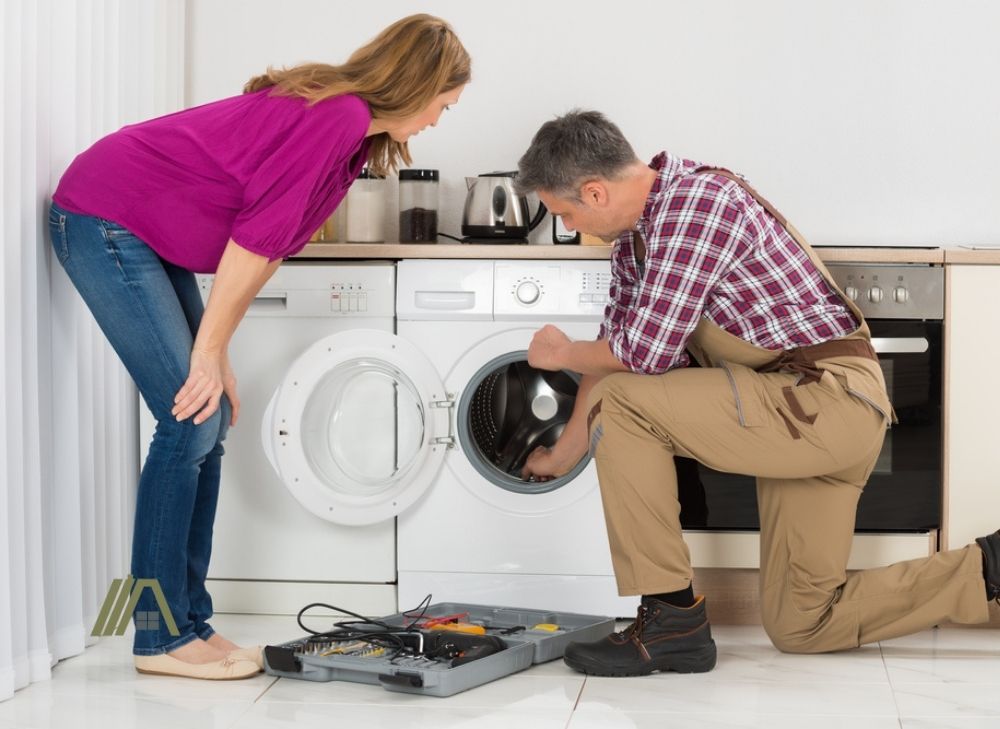
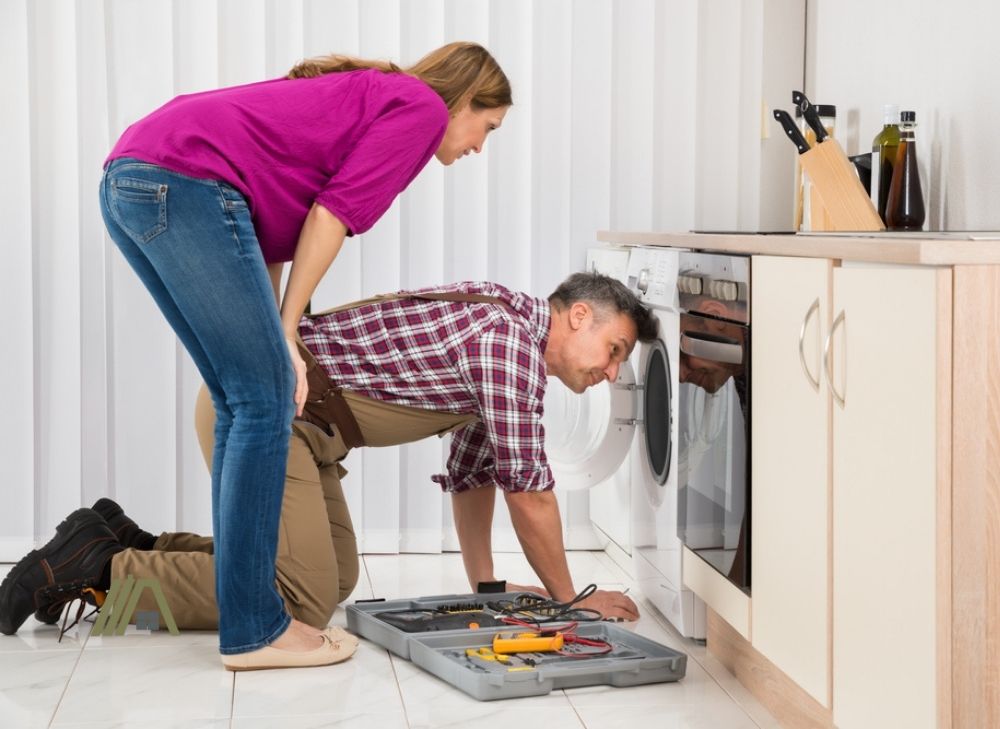
DIY Guide to Dryer Belt Replacement
As nosotros take seen, the DIY road volition virtually likely live the best option, unless, of form, y'all are physically unable to replace the belt yourself or make non experience skilled enough. The process is elementary only working about the drum tin can live tricky.
It may be a practiced thought to have a friend or family unit fellow member at that place for support when removing in addition to replacing the drum equally it is bulky in addition to holding everything inward home tin get awkward.
The Tools You Will Need too Their Cost
| Tool | Average cost | View on Amazon |
| Screwdriver | $eight – $20 | View |
| Flat bladed screwdriver | $9 | View |
| Dryer belt | $viii – $thirteen | View |
| Pulley | $9 | View |
| Flashlight | $ix- $22 | View |
Step one: Disconnect the Dryer
Safety is e'er first with whatsoever DIY projection. You are going to desire to disconnect your dryer from its electric render to forbid an electrical daze from occurring. You volition too demand to take the exhaust should your dryer live attached to one.
No connections permit yous to maneuver your dryer away from the wall to work on it meliorate.
Note: While DIY is a keen option, it is strongly suggested that yous hire a professional should y'all have a gas pipage (for gas dryers) or your dryer is hardwired into your electric provide.
Step 2: Disassemble the Dryer
Now it’sec time for the fun part. Disassembling your dryer. Not all dryers are built the same, and so y'all volition take to disassemble them differently.
Kenmore too Whirlpool modelsecond:
- Remove the lint trap on the meridian panel as well as the screws plant beneath it.
- Place a flat-bladed screwdriver under the front end of the elevation panel as well as popular it open up past releasing the jump clips on either side.
- Lift the pinnacle in addition to thin it back.
- Disconnect the door switch.
- Remove the screws on the within of the forepart panel.
- Lift together with pull out the front end panel.
If your model has ii sort front end panels:
- Use your apartment-headed screwdriver to force in addition to unclip the lower panel starting time.
- Remove the screws from the bottom as well as elevation of the upper front panel in addition to gently pull it off.
Maytag models:
- Remove the 2 screws on the front end panel in addition to the two screws on the door hinges.
- Lift together with draw out the door.
- Remove the forepart panel by pulling it towards you and unhooking it from the 2 clips at the bottom of the dryer.
- Unscrew the ii brackets on each side of the front panel that lies between the front end panel as well as the bulkhead.
- Lift the elevation of the dryer.
- If you tin’t lean the summit panel on a wall, tie it down past hooking wire through the tiptop panel as well as a hole inward the side panels of the dryer.
- Remove the frame inward front end of the drum past removing the Phillips head screws start.
- Remove the screws from the frame property the drum in place. You don’t demand to disconnect the door switch hither.
Other Maytag models may accept ii screws at the bottom of the front end panel.
- Remove these screws and swing the panel out from the bottom.
- Unclip it from the clips at the elevation.
- Disconnect the door switch and take away the wiring from the front bulkhead.
- Remove the forepart bulkhead by removing the screws.
Regardless of the model you lot accept at domicile, y'all are going to want to inspect the drum offset before going farther, because if your belt is all the same intact so it may inward fact be a motor outcome in addition to non a belt result.
Step 3: Remove the Drum
You can either withdraw the drum or operate under the drum. It may be easier to slide the broken belt off the drum in addition to take away it. If the belt is broken in that location should be no tension on the drum too the idler pulley, together with it should be tardily to slide it off.
Take this chance to turn over your dryer a skilful clean as well as withdraw all the debris and lint make-up that could drive problems afterward.
Step 4: Install the New Dryer Belt
Install your new dryer belt:
- Place the belt on the exterior of the drum, lined upwardly alongside the marks made past the previous belt, too brand sure the ribbed side of the belt faces the drum.
- Thread the belt around the idler pulley in addition to about the motor shaft. This office can live tricky.
- Kenmore in addition to Whirlpool dryers commonly accept 2 support rollers that yous can residuum the drum on. If yous accept no support rollers in your model, it would be best to have someone back up the drum patch y'all thread the belt around the pulley as well as motor shaft.
- Rotate the drum to ensure the belt is aligned correctly.
Step v: Reassemble the Dryer
Now it’s time to lay all the pieces dorsum together.
If yous had the Kenmore or Whirlpool dryer models:
- Slide your front end panel onto the tabs on each side
- Secure your front end panel alongside the screws provided.
- Reconnect your door switch at the height.
- Close the pinnacle panel in addition to clip it into place.
- Replace the lint trap screws together with the lint trap.
If your model has sort panels:
- Place the upper front end panel onto the brackets together with secure it with the 4 screws (ii pinnacle together with 2 bottom).
- Click inward the lower forepart panel as well as reconnect the door switch at the superlative of the dryer. Secure the superlative panel.
If you accept a Maytag model:
- Place the bulkhead inwards occupation amongst the drum too secure it with the screws.
- Close the summit panel.
- Place the panel, institute between the front end panel as well as the bulkhead, upwards together with screw inwards the brackets that were removed (ane on each side).
- Slide your front end panel inward from the bottom as well as clip it inward the bottom clips.
- Screw in the front panel too the door.
If y'all have a Maytag model alongside the screws at the bottom of the forepart panel:
- Replace the bulkhead and screw it back on.
- Slide the forepart panel nether the pinnacle panel as well as clip it inward.
- Lower the front panel back into place in addition to secure it with the bottom mounting screws.
Step half-dozen: Reconnect the Dryer

Reconnect your exhaust vents too plug inward your dryer, in addition to you should be fix to become. As mentioned, if your dryer is hardwired into your electrical supply delight seek professional person aid.
Sources
https://www.howmuchisit.org/dryer-belt-toll/
https://www.wikihow.com/Change-a-Clothes-Dryer-Belt
https://www.homeserve.com/en-us/weblog/price-take/dryer-repair-price/


Comments
Post a Comment